

Common Pool Enclosure Problems and How to Fix Them
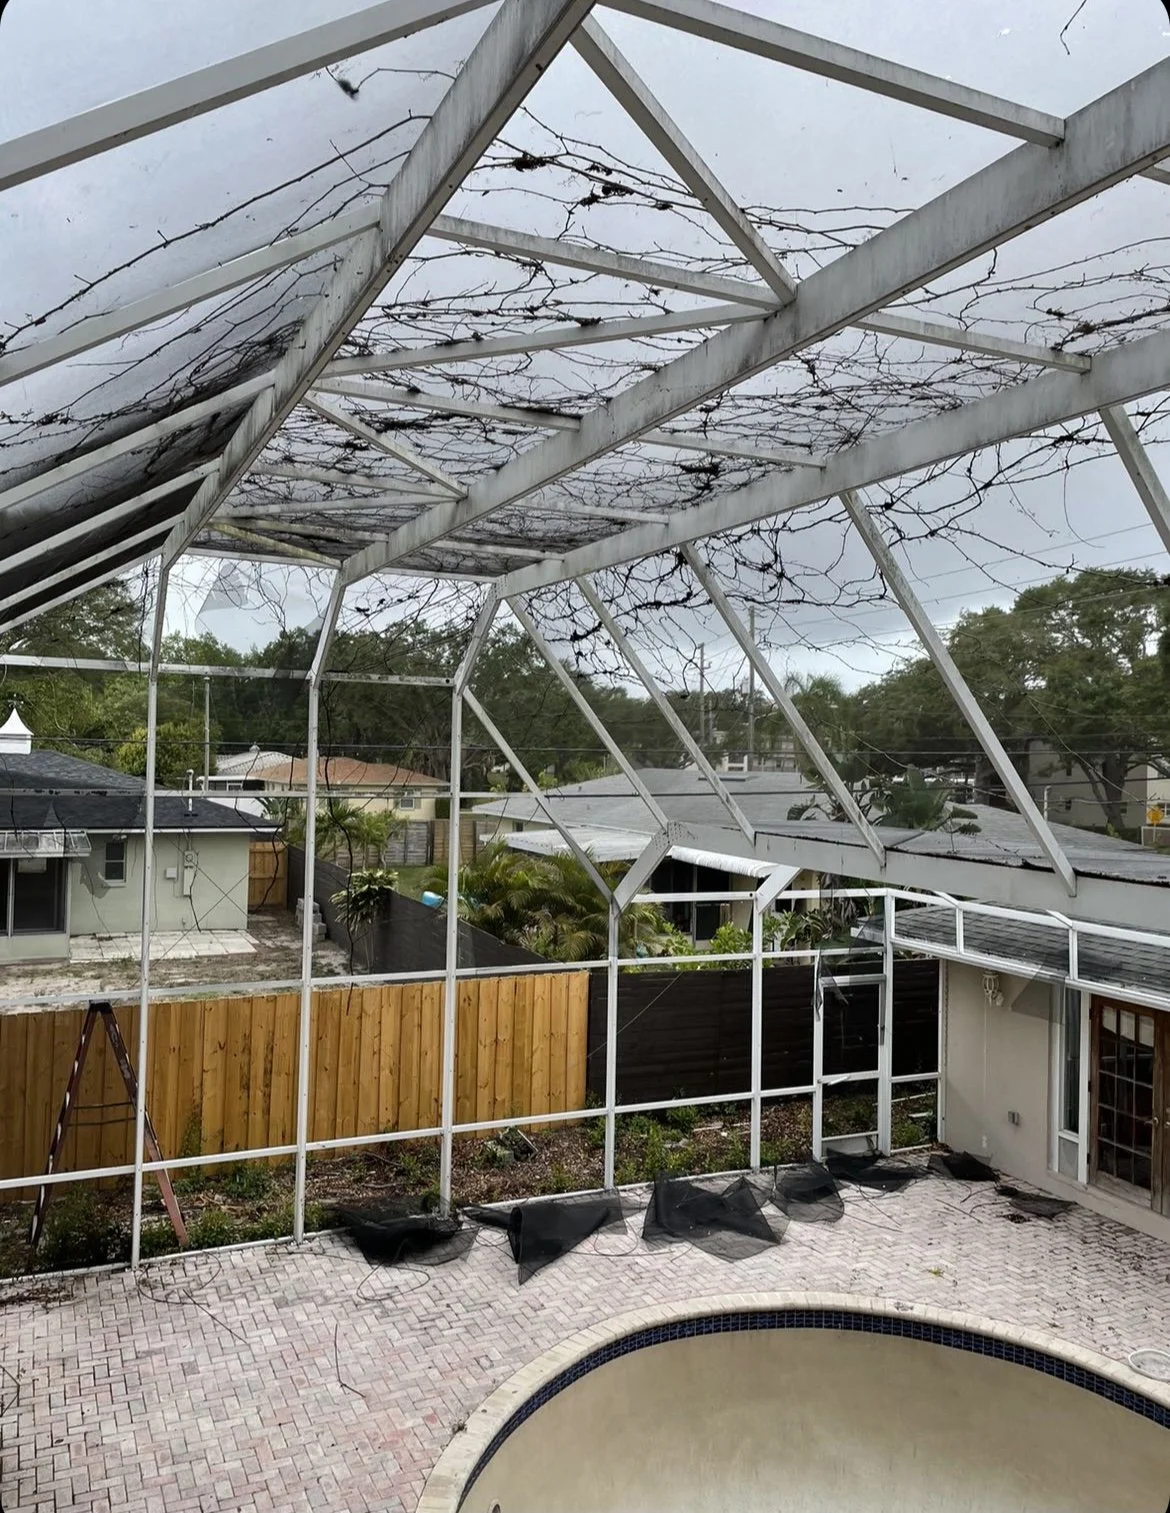
Your pool enclosure is designed to enhance your outdoor living experience by keeping bugs out, debris away from your pool, and creating a comfortable space for year-round enjoyment. However, like any home structure, pool enclosures can develop various problems over time due to weather exposure, normal wear and tear, or improper maintenance.
At Screening Dunrite, we've seen and fixed virtually every pool enclosure problem imaginable across thousands of Florida homes. This comprehensive guide identifies the most common issues homeowners face with their pool enclosures and provides practical, step-by-step solutions for addressing them. Whether you're a DIY enthusiast looking to tackle repairs yourself or simply want to understand what's happening before calling professionals, this guide will help you identify problems early and implement the right fixes.
Structural Issues
1. Sagging Roof Sections
A sagging roof is one of the most serious structural issues that can affect your pool enclosure, potentially leading to collapse if left unaddressed.
Causes:
Accumulated debris adding weight
Damaged or corroded support beams
Improper initial construction
Foundation settlement
Hurricane or storm damage
DIY Assessment:
Visually inspect from inside the enclosure, looking for obvious dips or uneven sections
Check if water pools in certain roof areas after rain
Examine support beams for signs of bending or damage
Look for gaps where roof sections meet walls
Solutions:
For Minor Sagging:
Remove any accumulated debris from the roof
Check and tighten all fasteners connecting roof beams
Install additional support brackets at connection points
Product Recommendation: Heavy-Duty Aluminum Support Brackets - $24.99 per pair
Pros: Easy installation, provides immediate reinforcement
Cons: May not solve underlying structural issues
Best for: Minor sagging in otherwise sound structures
For Moderate to Severe Sagging:
This requires professional intervention. Our Structural Repair Service includes:
Comprehensive structural assessment
Reinforcement or replacement of damaged beams
Correction of roof pitch and drainage
Fastener upgrades to prevent recurrence
Warning Signs for Immediate Professional Help:
Creaking or popping sounds from the structure
Visible bending of aluminum supports
Gaps wider than 1/4 inch at connection points
Progressive worsening of sagging
2. Leaning or Shifting Walls
Walls that lean or shift compromise the entire structure's integrity and often indicate foundation issues.
Causes:
Foundation settlement or erosion
Improper anchoring to deck
Impact damage from fallen trees/branches
Fastener failure at critical connection points
DIY Assessment:
Use a level to check wall verticality in multiple locations
Inspect the base track for signs of movement
Check for gaps between the enclosure and your home (for attached enclosures)
Examine deck anchors for looseness or corrosion
Solutions:
For Minor Leaning (less than 1 inch out of plumb):
Tighten or replace deck anchors (Tapcon screws)
Add additional anchors where needed
Reinforce corner connections with angle brackets
Product Recommendation: TAPCON 3/16-in x 3-1/4-in Concrete Anchors (75-Pack) - $49.99
Pros: Stainless steel for maximum corrosion resistance, excellent holding power
Cons: Requires proper drilling technique and equipment
Best for: Reinforcing or replacing deck anchoring fasteners
For Significant Leaning or Shifting:
This requires professional structural correction. The process typically involves:
Temporary bracing of the structure
Resetting or reinforcing foundation connections
Straightening and realigning wall sections
Installing additional support elements
Professional Insight: "Wall leaning often starts small but progresses rapidly, especially during storm seasons. Addressing it early can be the difference between a simple repair and complete reconstruction." - Screening Dunrite Lead Technician
3. Loose or Damaged Hurricane Cables
Hurricane cables are critical safety components designed to prevent your enclosure's roof from lifting during high winds.
Causes:
Corrosion of cable or attachment points
Improper initial installation
Impact damage
Fastener failure
DIY Assessment:
Visually inspect all hurricane cables
Check for fraying, rust, or damage
Verify that anchoring points are secure
Confirm proper tension (cables should be taut but not overstretched)
Solutions:
For Cable Replacement:
Purchase the correct replacement hurricane cable assembly
Remove the old cable by unscrewing the Tapcon fastener
Clean the anchoring area thoroughly
Pre-drill a new hole if necessary
Install the new hurricane cable with a fresh 3-inch Tapcon
Ensure proper tension according to manufacturer specifications
Product Recommendation: Hurricane Cable Replacement Kit - $45.99
Pros: Includes all necessary hardware and detailed installation instructions
Cons: Requires proper tools and some technical knowledge
Best for: Replacing damaged or corroded hurricane cables
For Professional Installation:
Our Hurricane Preparation Service includes:
Complete hurricane cable system assessment
Replacement of damaged or corroded cables
Upgrade to higher-grade components if needed
Verification of proper tension and anchoring
Seasonal Maintenance Tip: Inspect all hurricane cables before hurricane season begins (by May) and after any major storms. This simple check can prevent catastrophic damage during high winds.
Screen and Spline Issues
4. Torn or Damaged Screens
Screen damage is perhaps the most common issue pool enclosure owners face, allowing insects and debris to enter.
Causes:
Impact from debris or objects
Pet or wildlife damage
UV degradation over time
Pressure washing damage
Children or accidental human impact
DIY Assessment:
Inspect all screen panels for tears, holes, or separation from frames
Note the size and location of damaged areas
Check if damage is isolated or widespread
Determine if the frame around damaged screens is in good condition
Solutions:
For Small Tears (under 1 inch):
Clean the area around the tear
Apply screen repair tape or patches to both sides
Trim any loose threads or edges
Product Recommendation: Gorilla Waterproof Patch & Seal Tape - $8.99
Pros: Extremely easy application, nearly invisible when properly applied
Cons: Temporary solution, may need replacement after 6-12 months
Best for: Quick repairs of small tears
For Medium Tears (1-3 inches):
Use a screen patch kit with adhesive frame
Cut the patch larger than the damaged area
Apply to both sides of the screen
Product Recommendation: Screen Repair Kit with Frame - $19.99
Pros: Creates structured repair that resists further tearing, good durability
Cons: More visible than tape repairs, limited size options
Best for: Medium-sized damage that needs more durability than tape
For Large Tears or Multiple Damages:
Individual panel rescreening is the most effective solution:
Remove the damaged panel's spline using needle-nose pliers
Remove old screen material
Cut new screen material 2 inches larger than the opening on all sides
Install new screen using appropriate spline and a spline roller tool
For detailed instructions on rescreening individual panels, our DIY Pool Enclosure Maintenance Course includes step-by-step video guidance.
5. Loose or Sagging Screens
Screens that sag or appear loose within their frames not only look unsightly but are more susceptible to damage.
Causes:
Spline deterioration
Improper initial installation
Screen material stretching over time
Excessive pressure during cleaning
Impact that didn't tear but stretched the screen
DIY Assessment:
Gently press on the screen in various locations
Look for areas where the screen moves more than 1/2 inch when pressed
Check if the spline is visible and seated properly in the groove
Note if sagging is uniform or concentrated in specific areas
Solutions:
For Minor Sagging Due to Loose Spline:
Identify sections where spline is loose or coming out
Use a spline roller to press the existing spline back into the groove
For very loose sections, remove the spline and reinstall it
Product Recommendation: Professional Spline Roller Tool - $12.99
Pros: Dual wheels for different applications, ergonomic handle
Cons: Requires some practice to use effectively
Best for: Reinstalling loose spline and screen installation
For Screens with Stretched Material:
Complete panel rescreening is typically necessary:
Remove the old spline and screen
Cut new screen material 2 inches larger than the opening
Position the screen squarely over the frame
Install new spline, starting at a corner and working around the perimeter
Maintain consistent tension as you go
Trim excess screen after spline installation is complete
Professional Tip: "When rescreening, pull the screen diagonally from the corner you're working toward. This creates even tension across the panel and prevents future sagging." - Screening Dunrite Installation Specialist
6. Brittle or Damaged Spline
The spline is the flexible cord that holds your screen in the frame groove. When it deteriorates, screens become loose and vulnerable.
Causes:
UV exposure causing hardening
Age-related deterioration
Improper size for the channel
Poor quality materials
Excessive heat exposure
DIY Assessment:
Examine the spline in several locations around the enclosure
Press gently with your fingernail - it should have some give
Look for cracking, brittleness, or sections pulling out of the groove
Check if the spline is consistently seated in the channel
Solutions:
For Partial Spline Replacement:
Remove the damaged section of spline using needle-nose pliers
Measure the spline diameter and type (flat or round)
Purchase matching replacement spline
Carefully remove the screen from the damaged section
Install new spline using a spline roller
Trim excess screen material
Spline Selection Guide:
For enclosures with flat spline grooves: .310" to .315" flat spline
For enclosures with round spline grooves: .220" round spline
For pet screen or Florida Glass: .285" flat spline
Product Recommendation: Phifer .220" Round Spline 500' - $39.99
Pros: Industry standard quality, consistent diameter, good flexibility
Cons: May stiffen over time in extreme heat
Best for: Older pool enclosures with round channels
For Complete Spline Replacement:
When spline is deteriorated throughout the enclosure, complete rescreening is often the most efficient solution, as it addresses both screen and spline issues simultaneously.
Door and Hardware Problems
7. Door Alignment Issues
Misaligned doors create gaps that allow insects to enter and make opening and closing difficult.
Causes:
Hinge wear or loosening
Frame shifting or settling
Impact damage
Improper initial installation
Warping of door frame components
DIY Assessment:
Check if the door closes completely without forcing
Look for uneven gaps around the door when closed
Test if the door stays closed without latching
Observe if the door drags on the track or binds when opening/closing
Solutions:
For Minor Misalignment:
Tighten all hinge screws
Adjust hinge positions by loosening screws and repositioning
Add shims behind hinges to change alignment
Adjust striker plate position for proper latch engagement
Product Recommendation: Adjustable Door Hinge Set - $29.99
Pros: Allows fine-tuning of door position without repositioning
Cons: More expensive than standard hinges, requires careful adjustment
Best for: Correcting alignment issues without major reconstruction
For Significant Misalignment:
Remove the door completely
Check the door frame for squareness using a carpenter's square
Adjust or reinforce the frame as needed
Reinstall the door with new hinges
Test and adjust until proper operation is achieved
When to Call Professionals:
If the door frame is severely warped or damaged
If misalignment is due to structural shifting of the enclosure
If multiple adjustment attempts haven't resolved the issue
8. Malfunctioning Door Closers
Door closers (often called "door pumps") ensure your enclosure door closes automatically, preventing accidental access and insect entry.
Causes:
Internal fluid leakage
Spring tension loss
Mounting bracket failure
Improper adjustment
Physical damage
DIY Assessment:
Observe door closing action - should be smooth and complete
Check if door closes fully and latches
Look for fluid leaking from the closer cylinder
Verify that mounting brackets are secure
Solutions:
For Adjustment Issues:
Locate the adjustment screws (typically two)
One controls closing speed
One controls final latching speed
Turn clockwise to slow down, counter-clockwise to speed up
Make small adjustments (1/4 turn) and test
Adjust until door closes completely without slamming
For Closer Replacement:
Purchase a compatible replacement closer
Remove the old closer by unscrewing from door and jamb
Install new closer following manufacturer instructions
Adjust tension for proper operation
Product Recommendation: Wright Products VH2000 Pneumatic Closer - $24.95
Pros: Designed specifically for screen doors, adjustable closing speed
Cons: Requires precise installation for optimal performance
Best for: Replacing worn door closers on pool enclosure doors
9. Track and Roller Problems
Sliding doors rely on tracks and rollers for smooth operation, and these components often develop problems.
Causes:
Debris accumulation in tracks
Roller wear or damage
Track corrosion or bending
Improper installation
Impact damage
DIY Assessment:
Inspect tracks for debris, damage, or corrosion
Check rollers for smooth rotation and wear
Verify track alignment and mounting
Test door operation for binding or jumping
Solutions:
For Track Cleaning and Maintenance:
Remove loose debris with a vacuum
Clean tracks with a small brush and mild detergent
Rinse thoroughly and dry completely
Apply silicone spray lubricant sparingly
Remove excess lubricant to prevent dirt accumulation
Product Recommendation: Blaster Silicone Lubricant - $7.99
Pros: Doesn't attract dirt, long-lasting lubrication, safe for all door components
Cons: Overspray can make floors slippery if not carefully applied
Best for: Lubricating tracks, rollers, and other moving door parts
For Roller Replacement:
Lift door slightly and support with blocks
Remove screws holding rollers to door frame
Extract old rollers
Install new rollers of the same type
Adjust height if needed
Reinstall door and test operation
Product Recommendation: Adjustable Screen Door Rollers (4-Pack) - $19.99
Pros: Height-adjustable, smooth operation, durable nylon wheels
Cons: May require minor modifications for some door types
Best for: Replacing worn or damaged rollers on sliding screen doors
Fastener and Connection Issues
10. Rusted or Failed Fasteners
Fasteners are the unsung heroes holding your enclosure together, and their failure can lead to serious structural issues.
Causes:
Exposure to moisture and chlorine
Use of inappropriate fastener materials
Age-related corrosion
Galvanic reaction between dissimilar metals
Overtightening during installation
DIY Assessment:
Inspect visible fasteners for rust, corrosion, or white powder
Check for looseness or movement
Look for staining around fastener locations
Note any missing fasteners
Solutions:
For Preventative Maintenance:
Apply corrosion inhibitor to fasteners showing early signs of rust
Tighten any loose fasteners
Clean areas around fasteners showing corrosion
Product Recommendation: CRC Marine Corrosion Inhibitor - $12.99
Pros: Forms protective barrier, prevents further corrosion, easy application
Cons: Temporary solution for already corroded fasteners
Best for: Preventative maintenance on fasteners showing early corrosion
For Fastener Replacement:
Remove rusted fastener (if possible)
Clean the hole thoroughly
Apply rust converter to any remaining rust
Install new stainless steel fastener one size larger than original
Apply thread-locking compound for critical structural connections
Professional Insight: "Always replace rusted screws with the next size up. For example, replace #10 screws with #12, and #12 with #14. This provides additional holding power in the existing holes." - Screening Dunrite Technical Director
For Stripped or Frozen Fasteners:
For stripped screws that cannot be removed, install a new screw about an inch away
Apply rust reformer to the stripped screw
For frozen fasteners, apply penetrating oil and allow to soak
Use appropriate extraction tools if necessary
11. Separation at Connection Points
Connection points between different enclosure components can separate over time, compromising structural integrity.
Causes:
Fastener failure
Material fatigue
Thermal expansion and contraction
Wind stress
Impact damage
DIY Assessment:
Inspect all major connection points (wall-to-roof, corner joints, etc.)
Look for gaps or visible separation
Check for movement when pressure is applied
Note any unusual noises (creaking, popping) when wind blows
Solutions:
For Minor Separation:
Clean the separated area thoroughly
Install additional fasteners to reinforce the connection
Add support brackets where appropriate
Seal gaps with appropriate caulking if needed
Product Recommendation: L-Shaped Aluminum Reinforcement Brackets (4-Pack) - $19.99
Pros: Provides immediate structural reinforcement, easy installation
Cons: Visible after installation, may require painting to match
Best for: Reinforcing corner connections and structural joints
For Major Separation:
This typically requires professional intervention:
Temporary bracing to prevent further movement
Realignment of separated components
Installation of specialized reinforcement hardware
Replacement of damaged connection components
Warning Signs for Immediate Professional Help:
Separation greater than 1/4 inch
Progressive worsening of separation
Visible bending or distortion of connecting elements
Separation at multiple connection points
Water and Drainage Issues
12. Standing Water on Roof Panels
Water pooling on roof panels adds weight stress and accelerates material degradation.
Causes:
Insufficient roof pitch
Sagging structural elements
Clogged drainage paths
Improper initial design
Settling of foundation
DIY Assessment:
Inspect roof after rainfall for water accumulation
Note how long water remains standing
Check if water is causing visible sagging
Identify drainage paths and potential blockages
Solutions:
For Drainage Path Clearing:
Remove debris from roof panels
Clear any clogged drainage channels
Ensure downspouts are functioning properly
Trim overhanging branches that may drop debris
For Minor Pitch Issues:
Install additional support under low areas
Add extension tubes to existing downspouts
Consider installing gutter systems designed for pool enclosures
Product Recommendation: Amerimax Flex-A-Spout Downspout Extension - $12.99
Pros: Flexible design, extends up to 24 inches, directs water away from foundation
Cons: May require seasonal replacement in Florida's climate
Best for: Enhancing existing downspout performance during heavy rainfall
For Significant Drainage Problems:
Professional solutions may include:
Structural reinforcement to correct sagging
Installation of additional drainage systems
Modification of roof pitch in problem areas
Addition of specialized gutter systems
13. Water Intrusion at Wall Connections
Water leaking where the enclosure connects to your home can cause significant damage to both structures.
Causes:
Failed or missing flashing
Improper initial installation
Sealant deterioration
Structural movement
Clogged drainage channels
DIY Assessment:
Inspect connection areas during rainfall
Look for water stains or damage on interior surfaces
Check for gaps or separation at connection points
Verify that flashing (if present) is intact and properly positioned
Solutions:
For Sealant Replacement:
Remove old, deteriorated sealant
Clean surfaces thoroughly and allow to dry completely
Apply appropriate outdoor silicone sealant
Tool for proper water shedding
Allow to cure completely before testing
Product Recommendation: GE Silicone II Outdoor Waterproof Sealant - $8.99
Pros: Remains flexible, excellent water resistance, UV resistant
Cons: Requires proper surface preparation for adhesion
Best for: Sealing gaps at wall connections and flashing edges
For Flashing Repair or Replacement:
Remove damaged or improperly installed flashing
Clean and prepare the surface
Install new flashing according to manufacturer specifications
Seal edges appropriately
Test with water to verify proper function
When to Call Professionals:
If water intrusion is severe or persistent
If damage extends into wall structures
If proper flashing installation requires roof or siding modification
If multiple repair attempts haven't resolved the issue
Learn More with Our DIY Course
For homeowners who want to master professional-level repair techniques, our DIY Pool Enclosure Maintenance Course provides comprehensive instruction on diagnosing and fixing common pool enclosure problems. The course includes:
Detailed troubleshooting guides
Step-by-step repair videos
Tool selection and usage techniques
Material selection guidance
Preventative maintenance strategies
Conclusion
Pool enclosure problems are inevitable over time, but with proper identification and timely intervention, most issues can be resolved before they lead to major damage or costly replacements. By understanding the common problems outlined in this guide—from structural issues like sagging roofs and leaning walls to screen damage, door problems, and water intrusion—you can take a proactive approach to maintaining your enclosure.
Remember that while many repairs can be handled as DIY projects, some issues, particularly those involving structural integrity, may require professional intervention. When in doubt, it's always better to consult with experts rather than risk safety or cause additional damage.
At Screening Dunrite, we're committed to helping Florida homeowners maintain their pool enclosures in optimal condition. Whether you need professional repair services or guidance for DIY maintenance, our team of experts is here to help ensure your enclosure continues to enhance your outdoor living experience for years to come.
⸻
This article was written by the experts at Screening Dunrite, Florida's trusted pool enclosure specialists since 2010. For more information about our services or to schedule a repair consultation, visit www.screeningdunrite.com.
⸻
Keywords: pool enclosure problems, screen enclosure repairs, fix pool cage issues, pool enclosure door repair, sagging pool enclosure roof, screen repair solutions, pool enclosure leaks, hurricane cable replacement, pool cage maintenance, Florida pool enclosure fixes